How It Works
The entire Network is segmented into ranges according to two parameters:
- Accounts
- Cost Centres
Initial Network Settings
Initially, you will have the following pre-defined Network IP Ranges:
| Start IP | End IP | Account | Cost Center |
|---|---|---|---|
| 0.0.0.0 | 9.255.255.255 | Public | Public |
| 10.0.0.0 | 10.255.255.255 | Private | Private |
| 11.0.0.0 | 171.255.255.255 | Public | Public |
| 172.0.0.0 | 172.255.255.255 | Private | Private |
| 173.0.0.0 | 191.255.255.255 | Public | Public |
| 192.0.0.0 | 192.255.255.255 | Private | Private |
| 193.0.0.0 | 255.255.255.255 | Public | Public |
Before You Begin: Defining Network IP Ranges
When defining a Network IP Range, it is not enough to supply the beginning and end of the range. At this stage, you must have already defined Accounts and Cost Centres with which to associate each range. These require strategic planning, and much thought as to the different means by which you will segment your Network.
For example, you can define a list of Accounts, which segment your Network into different user groups, and define a list of Cost Centres, which segment your network into Public and Private domains.
See: Accounts & Cost Centres
Configuring Network IP Ranges
To configure Network IP ranges, you must enter the Network Configuration Screen.
In this screen you can:
- Add new Network IP Ranges
- Search for existing Network IP Ranges
- Modify existing Network IP Ranges
- Delete existing Network IP Ranges
- View information about Network IP Ranges in use
- Generate traffic analysis reports for specific Network IP Ranges
- Expand the Configuration menu.
- Select Configuration > Business Groups > Network. The Network Configuration Screen appears in the display section.
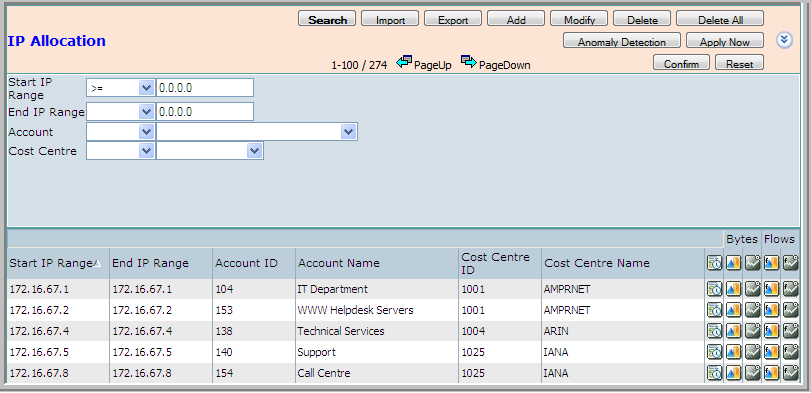
The Network Table
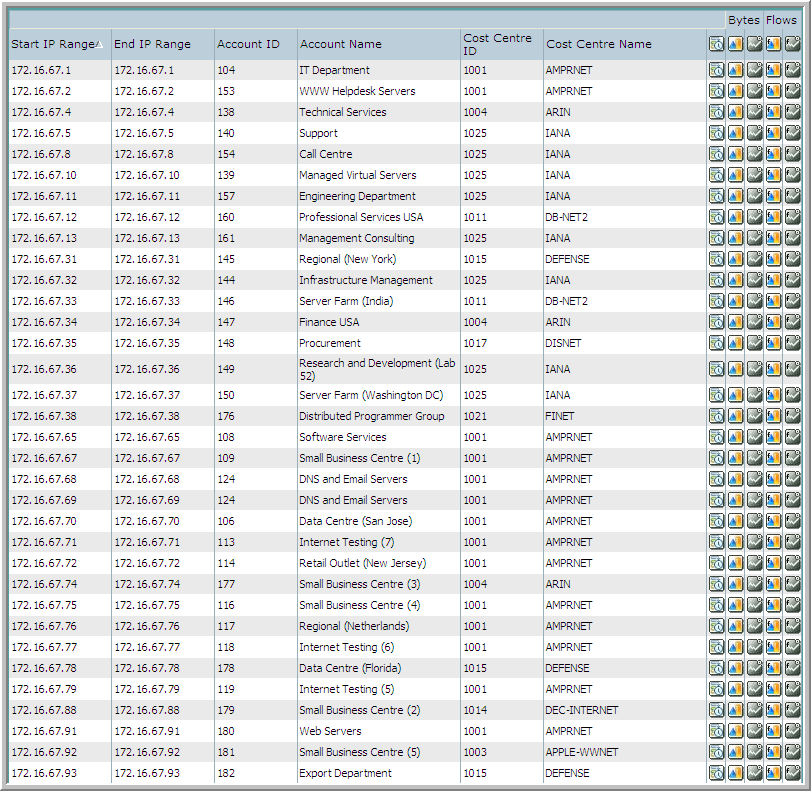
The Network Table includes the following elements:- Start IP Range – the Start IP of the Network IP range.
- End IP Range – the End IP of the Network IP range.
- Account ID – the ID of the account associated with this Network IP range.
- Account Name - the name of the account associated with this Network IP range.
- Cost Centre ID – the ID of the cost centre associated with this Network IP range.
- Cost Centre Name - the name of the cost centre associated with this Network IP range.
- Report Production Buttons
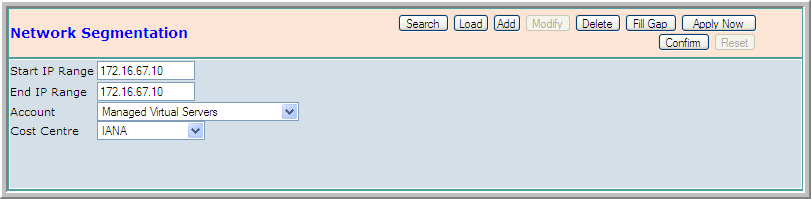
To add a new Network IP Range:
Using Form
- After entering Network Configuration, click the Add button.
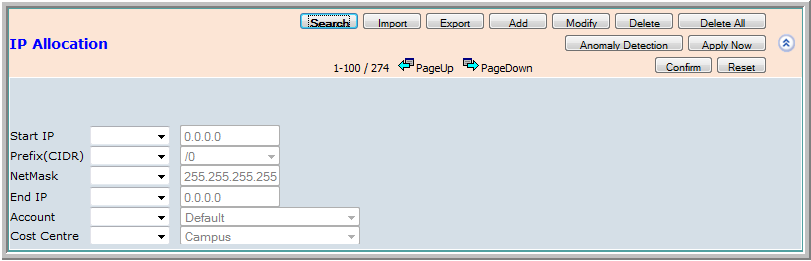
- Enter a Start IP Range (an IP address marking the beginning of the range).
- Enter an End IP Range (an IP address marking the end of the range).
- Select an Account from the list. This list is populated by all the defined accounts.
- Select a Cost Centre from the list. This list is populated by all the defined cost centres.
- Click Confirm. The new Network IP Range is added to the table.
The Upload process is deisigned to read all IP range configuration from a .CSV file and automatically upload these configurations into the Account, CostCentre and Network tables.
The DigiToll IP range upload feature reads configuration files from a choice of selected csv templates, catering for a variety of standard network output formats. This feature is used for initial uploads and busy enterprise environments.
Warning!: this feature will eliminate all previous configurations.
- After entering Network Configuration, click the Upload button.
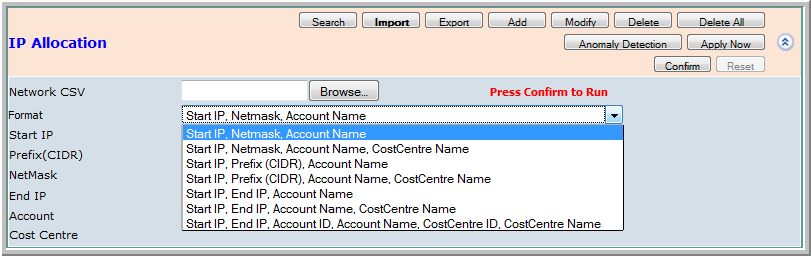
- Select CSV template format for information from the format menu.
- Browse to the location of the CSV file.
Click Confirm. The new Network IP Range is added to the table.
Modifying a Network IP Range
You may modify an existing Network IP Range.
To modify a Network IP Range:
- From the Network Table, select an existing Network IP Range by highlighting the appropriate row in the table.
- Click Modify. The Network IP Range's details will appear in the edit boxes.
- Edit any of the properties as you see fit.
- Click Confirm. The Network IP Range's details are updated in the table.
You may delete an existing Network IP Range.
To delete a Network IP Range:
- From the Network Table, select an existing Network IP Range by highlighting the appropriate row in the table.
- Click Delete. The Network IP Range's details will appear in the edit boxes.

- Make certain that you wish to delete this Network IP Range.
- Click Confirm. The Network IP Range is deleted from the table.
You may want the Network Table to display only a specified group of Network IP Ranges according to selected characteristics.
To search for existing Network IP Ranges:
- Above the Network Table table, click Search. The following is displayed:
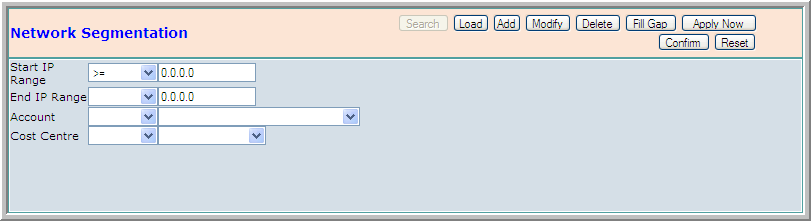
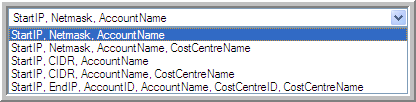
- Specify one or more search parameters. Do not forget to assign each search parameter with a logical operator.
- Click Confirm. The table is populated with all the Network IP Ranges which match the query parameters.
You may want to produce a traffic analysis report for a specific Network IP Range, or a baseline report for all Network IP Ranges.
To produce a report for a specific Network IP Range, click one of the Report Production buttons on the right-most column of that Network IP Range's row in the table.
Choose one of the following:
-
 produce a report baselining the last week of traffic usage from this IP Range (Source by Weekday).
 -
 produce a report showing the last month of traffic usage from this IP Range (Source by Dest. IP).
 -
 produce a report showing the last hour of traffic usage from this IP Range (Source by Server Port).
 -
 produce a report showing the last month of traffic flows from this IP Range (Source by Dest. IP).
 -
 produce a report showing the last hour of traffic flows from this IP Range (Source by Server Port).